Learn how to make your video content fly across the screen in Camtasia to grab viewer’s attention or create custom transitions.
Want to maximize Camtasia’s potential or get your hands on the Software? Contact ITC Learning at 02 9438 2500 or info@itclearning.com.au and ask about our Lectora Inspire package!
If you want to guide users through your courses, and ensure that they are learning all that they need to, locking down page navigation is a great way to start.
This means to disable navigation buttons such as next or back to ensure a user completes activities before allowing them to continue. This stops your user being able to rapidly click through your course to say that they’ve finished the module.
Navigation lockdown is achieved in two stages…
Deactivation
Reactivation
Deactivation
To deactivate our “Next Page” button, click on the page and add an action with the following properties…
Trigger : On page show
Action : Set State
Target : Next Button
State : Disabled
Reactivation
Next, we must tell Lectora when to re-enable the Next button. If your question or activity has a submit button, we can use that to reactivate our navigation. Add an action to the submit button with the following properties
Trigger : On Mouse Click
Action : Set State
Target : Next Button
State : Enabled
Conditions (Optional)
If you like, you can choose to have your next button activate only if the answer was correct.
To this, we use conditions. Conditions gives you further control on how and when actions occour. To create a condition, click on the conditions button in the actions tab where we just were. With the conditions creator, we are going to choose the variables that will form the basis of our conditions. Under variable, we are going to choose “Question 2”, and the relationship will be ‘is correct’. This means the Next button will activate only if the question was correct, and the user will be allowed to continue to the next page.
Initially Disabled (Lectora 17)
In Lectora 17, there is an option to ‘initially disable’ a button when the page loads. This means that a button will be disabled from the moment the page loads, without having to create an action.
To do this…
Click on the button
Click on the properties tab
Check the box that says “Initially Disabled”.
Remember though, If you navigation button is inherited into multiple pages, it will be initially disabled on every page it appears on. If you don’t want this, using actions is the preferred method.
Thanks for watching. If you have any questions at all, feel free to visit us at itclearning.com.au, or contact our support line at support@itclearning.com.au
For anyone using the custom results submission Google Drive/email options in the assessment chapter, be aware that there has been some changes to how Lectora works in those regards.
If you are facing issues with recording results from your eLearning Content, please contact ITC Learning Support.
ReviewLink is a cloud based system that developers can use to share eLearning content with key stakeholders.
You can upload content to ReviewLink directly from Lectora, by selecting Publish in the Development Tab, and locating ReviewLink in the dropdown. You can also upload courses published to SCORM from the ReviewLink web portal.
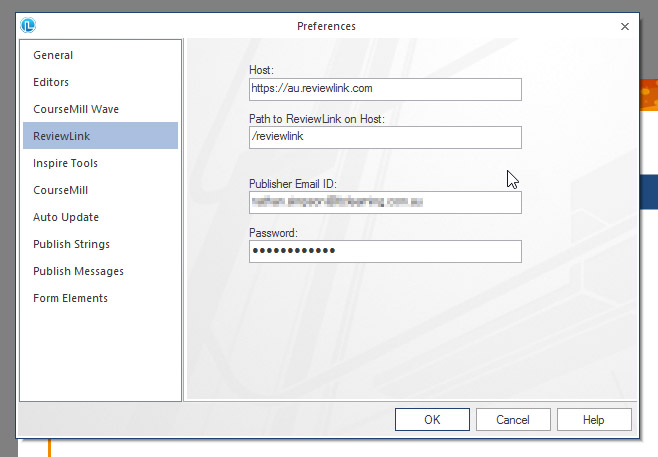
Before you publish however, you must ensure that your account is set to the Australian server of ReviewLink. To check or change this from within Lectora, go to your File Tab then select Lectora Preferences. In the window that appears, select ReviewLink from the left hand side menu. As in the image below, change the Host to https://au.reviewlink.com
If you already have a ReviewLink account, you can also log in on this screen. Otherwise, do not change any of the other information.
If you would like more information on how to use ReviewLink or how to integrate this into your company’s development cycle, please contact ITC Support at 1800 337 999 or support@itclearning.com.au
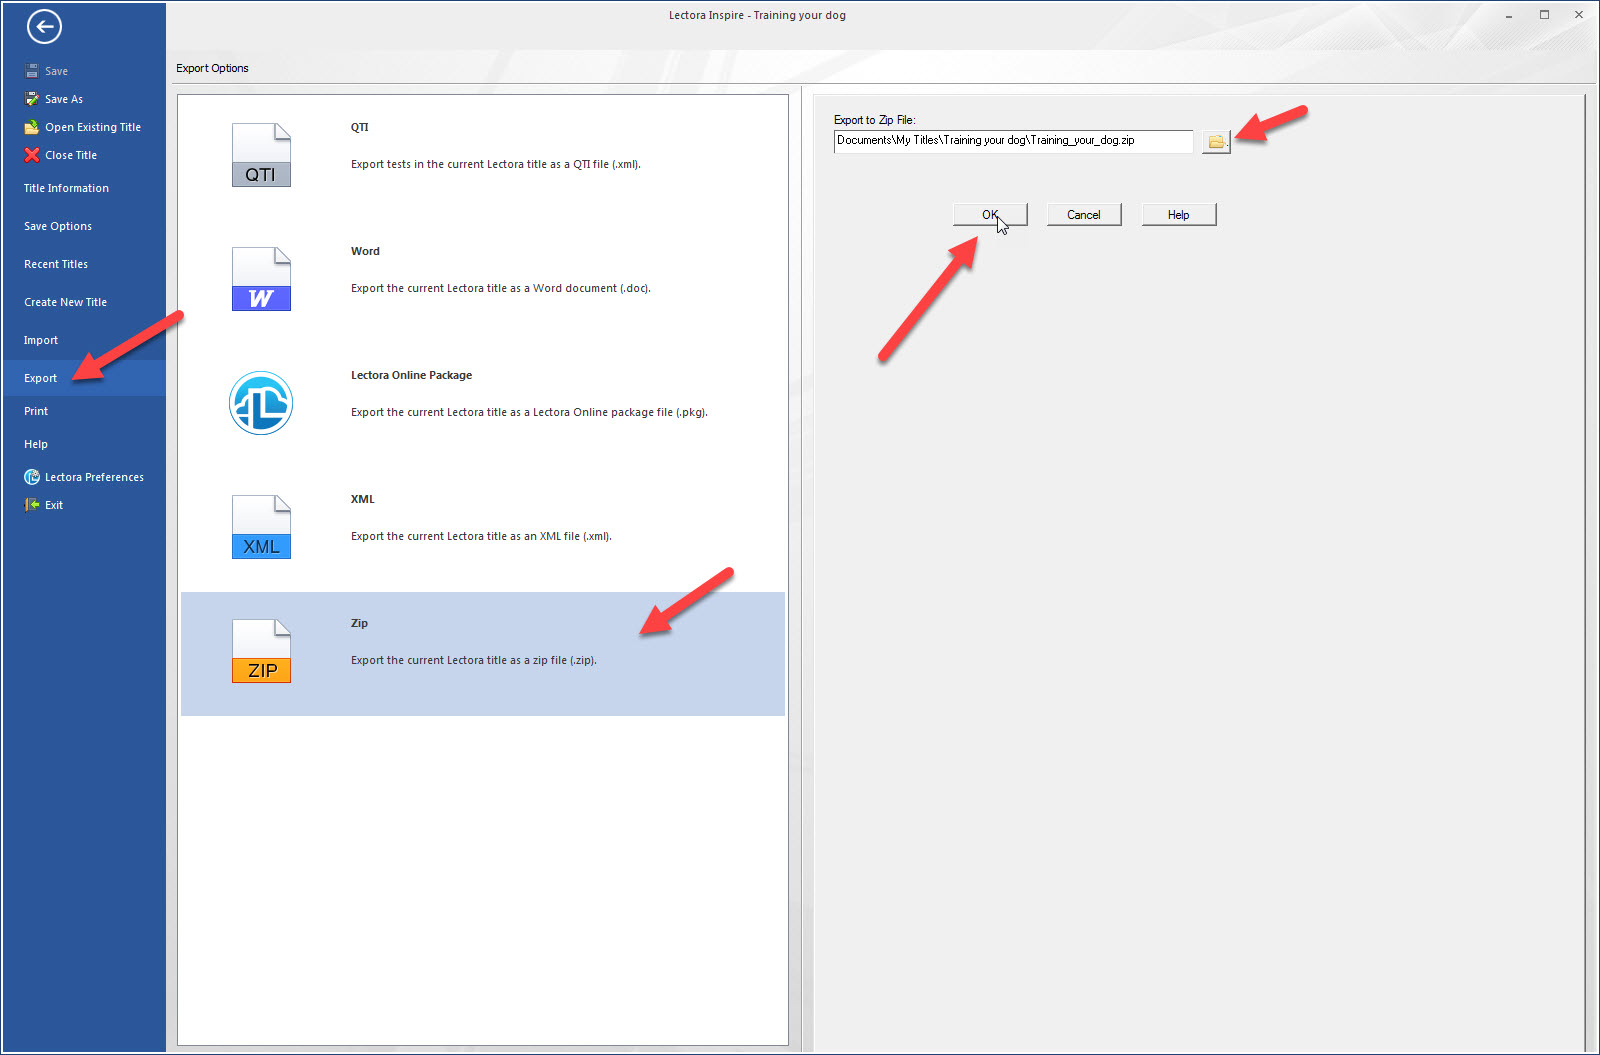
If you need to send your in-progress Lectora project files to another team member or even to ITC Learning Support, the simplest way to do this is to create a zip from Lectora. To do this, open your title and click on File > Export > Zip.
Once you have choosen your export location, click OK and a .zip file will be created where you specified. This file can now be copied onto a server, or shared using a Dropbox link or email.